Hello!
I'm up on themadscrapper.blog today with this gorgeous layout of my late parents who are now together forever.


Hello!
I'm up on themadscrapper.blog today with this gorgeous layout of my late parents who are now together forever.
Hello Again!
I'm here on the The Mad Scrapper blog today sharing 2 Christmas cards I have made using papers and embellishments from the Peace and Joy collection by 49-and-market.


I started by cutting out two white 6.5inch circle card blanks and then I took the Wishes paper and cut two slightly smaller circles but using the red side. On to that I passed white Gesso through my Finnabair-Iris stencil, after it was dry I distressed the edges. I added each flat to the card blank.


Hello Again!
Today I have a layout for The Mad Scrapper Blog. I have been revisiting some of my very first layouts and boy were some of them plain! So I have decided to break them down, removing the precious photos and in some case embelishments and remake them. This layout is one of the first I have completed and I have to say it resembles nothing of the first LOL.
Main photo
This is our son Jonathan who is now 28! I can say he loves this new version. I am using papers, ephemera and a rub-on from the Peace and Joy collection by 49andmarket. I started by punching stars around 2 edges of cherry-splashsmoothies by Bazzill. Then I cut the Starry page down to 11inch and distressed the edges, then taking the Tim Holtz-Stars-stencil I mixed up some gesso and acrylic paint in blue, green and red and sponged them through.
photo 1 + 2


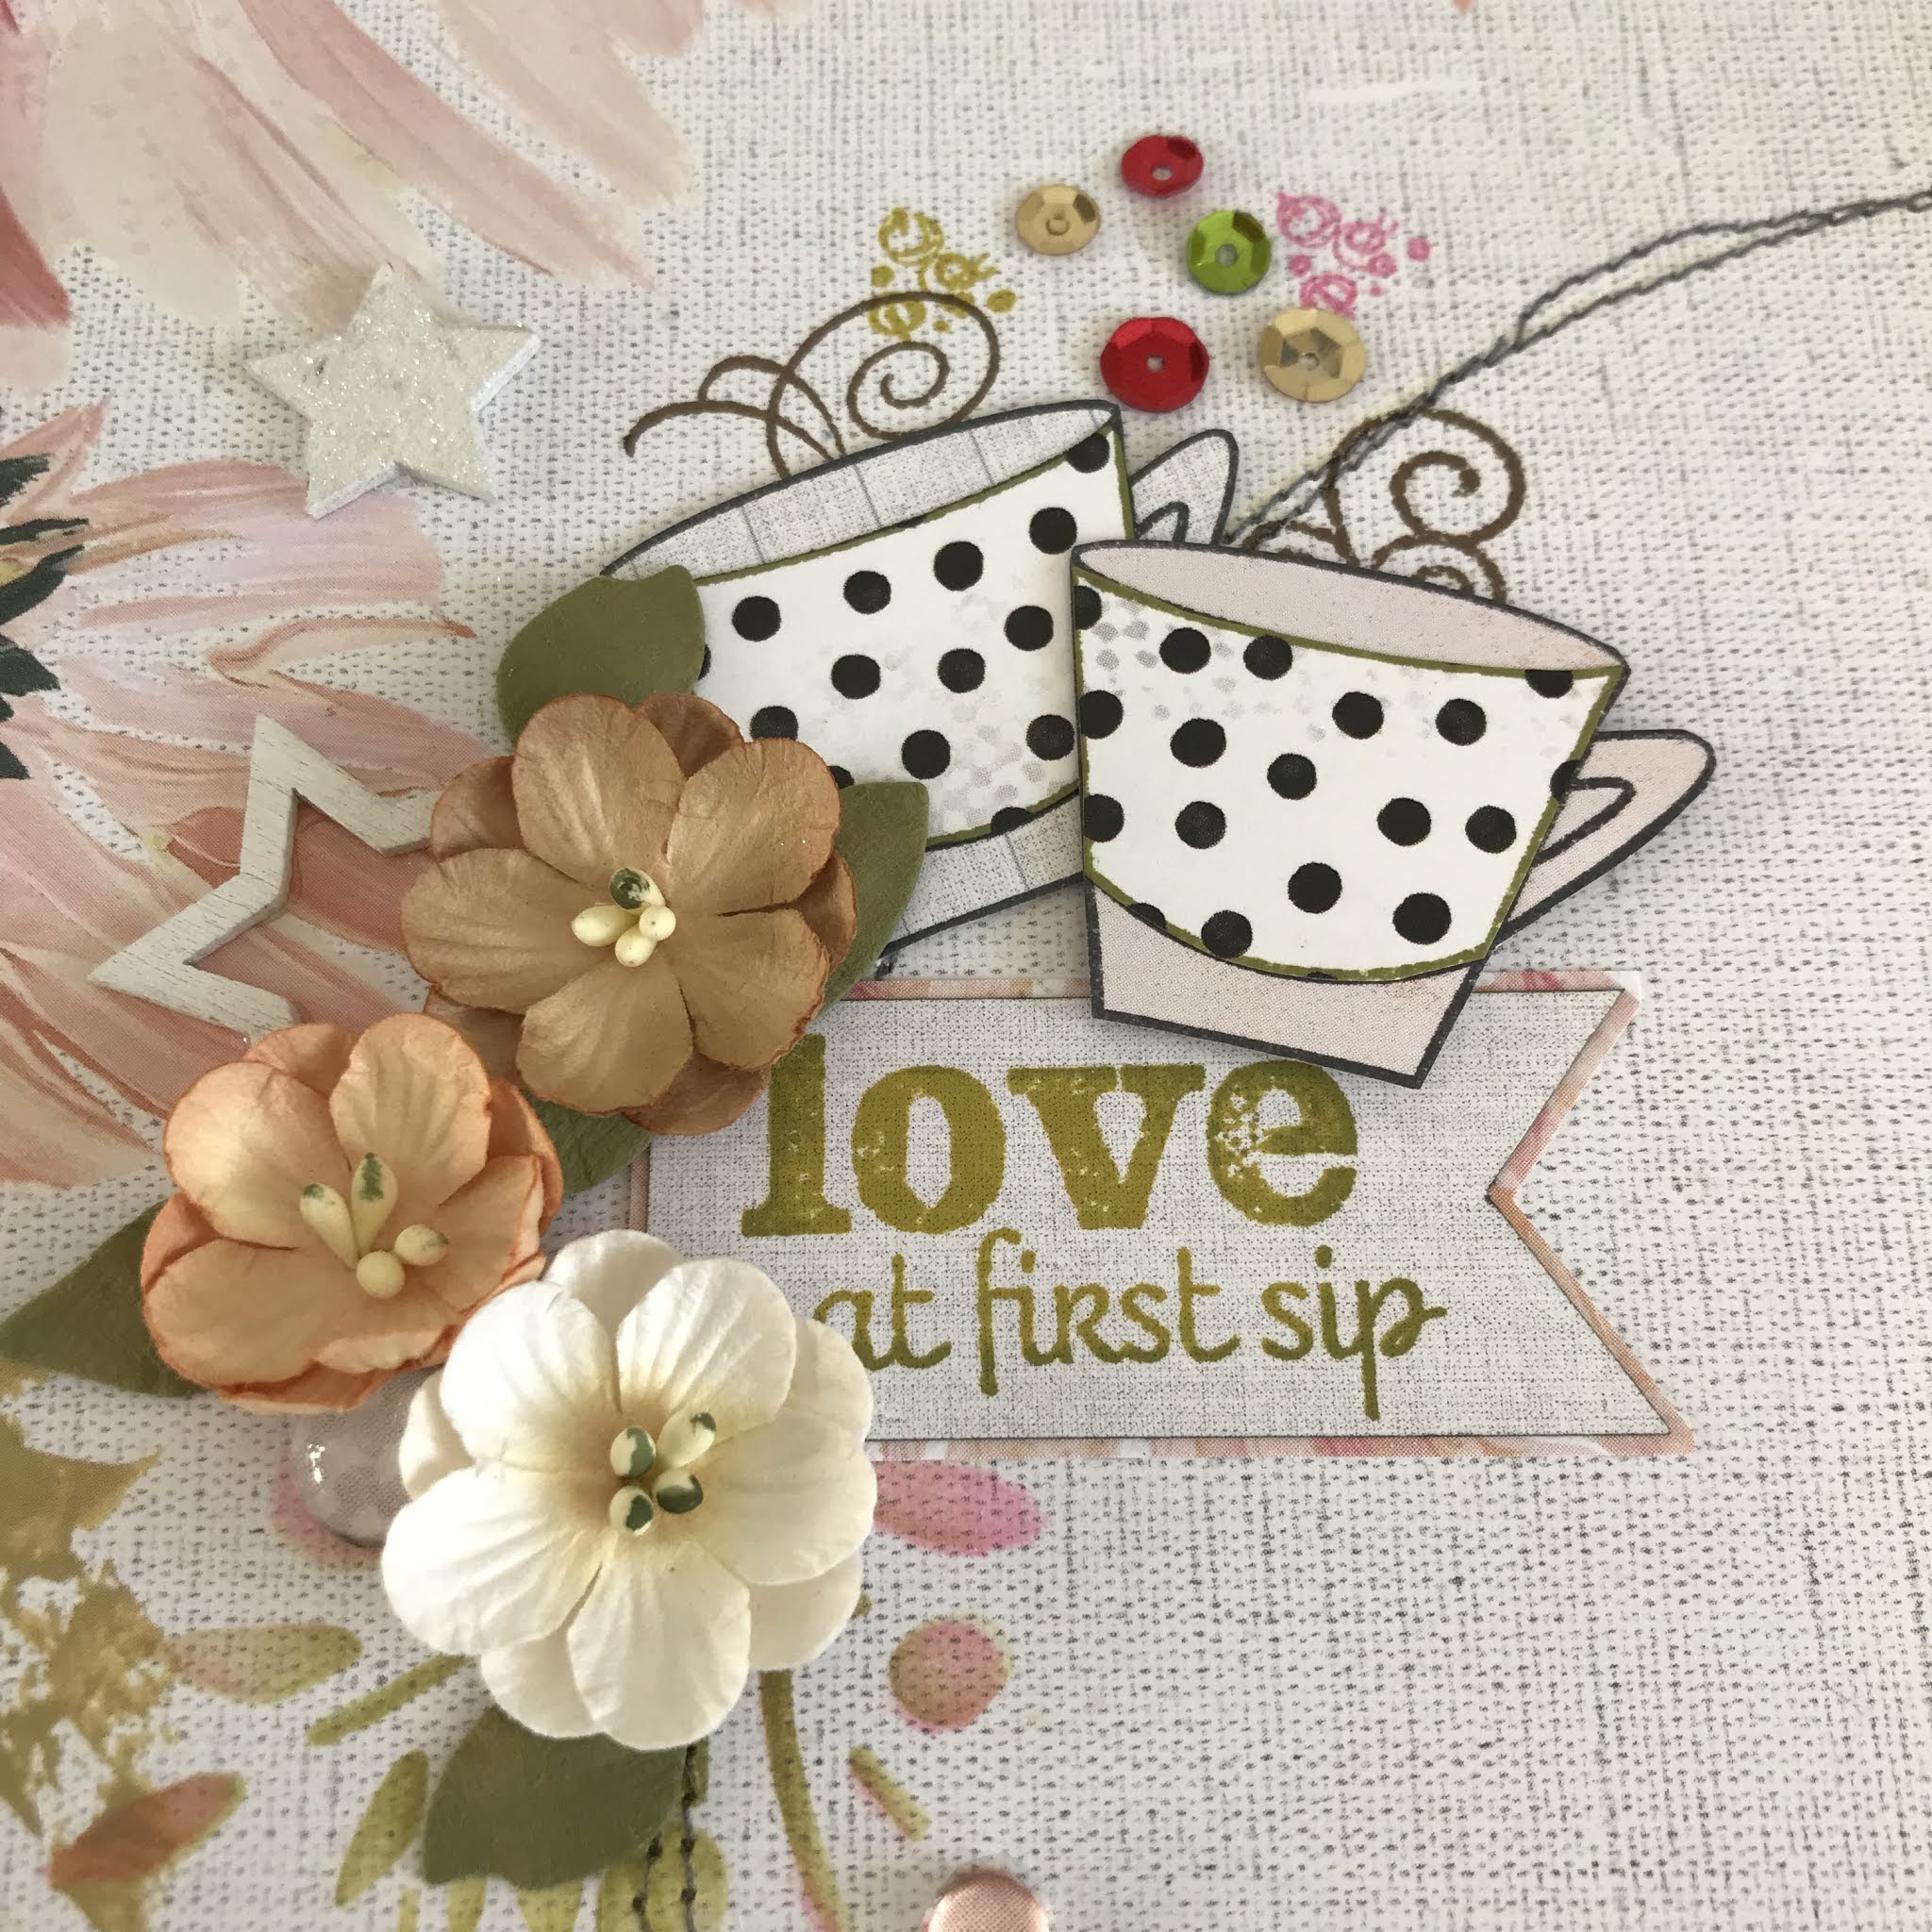
Hello!
Today I'm up on the themadscrapper.blog with a layout using a photo I have wanted to scrap with for nearly 2 years!


Hello there!
Today I am sharing a layout I have made as the Guest Designer over at kraftpluschallenges.blogspot.com .
I joined in with their challenge a couple of months back and was delighted to be chosen to GD.

As always you must use kraft card and follow the mood board they display, below is the one I followed

My layout shows my handsome (departed) cat. He was such a delight and will be forever in our hearts just as the sentiments say on the board.
I have used a 12inch dark-kraft by Bazzill and using my sewing machine I have stitched around all 4 sides. I stamped some paw prints and added some orange hearts by a stencil. Then I took out a selection of papers cutting each at 3/4inch and distressing all sides and added them to some foam before attaching to the kraft.
Here's a couple of close up shots of the layout.


The stamped sentiment is by Verve (My favourite) and other stickers are by Simple Stories. I have tucked a suitcase underneath the papers because he was sat on top of ours hoping to come with us and not to the cattery lol as we were all ready to leave for a holiday in France.
Other items used are a mini tab by dusty-attic, Nuvo drops and some white gesso and black acrylic paint which I used to make the splatters.
Thanks for stopping by today, please go over and check out the blog and hopefully join in.
Take care,
Sue.
Hello,
I'm sharing today a layout I have made to join in with the Facebook group for 49andmarket October Challenge and also the themadscrapperblog.

I have used supplies purchased at themadscrapper.co.uk This online store has an amazing variety of papers, flowers, stamps etc by 49-and-market click the link and have a good time.
Here is the challenge sketch we had to follow. We could flip it to make it work for us but I chose to keep close to the original this time.

Today I have decided to make a Autumn theme page using this wonderful photograph which was shared on a group I belong to by my friend. As soon as I saw it I knew I had to use it.

Papers used today are as follows pomegranate by Bazzill and 49-and-market/vintage-artistry-in-the-leaves-autumnal. I used a stencil and inked through with distress-ink-pad-walnut-stain, vintage-photo and fired-brick. Then I stitched using red metallic thread around the bottom right and just normal red up at the top left. I used a note pad style punch to the left side and then attached it to the Bazzill card.
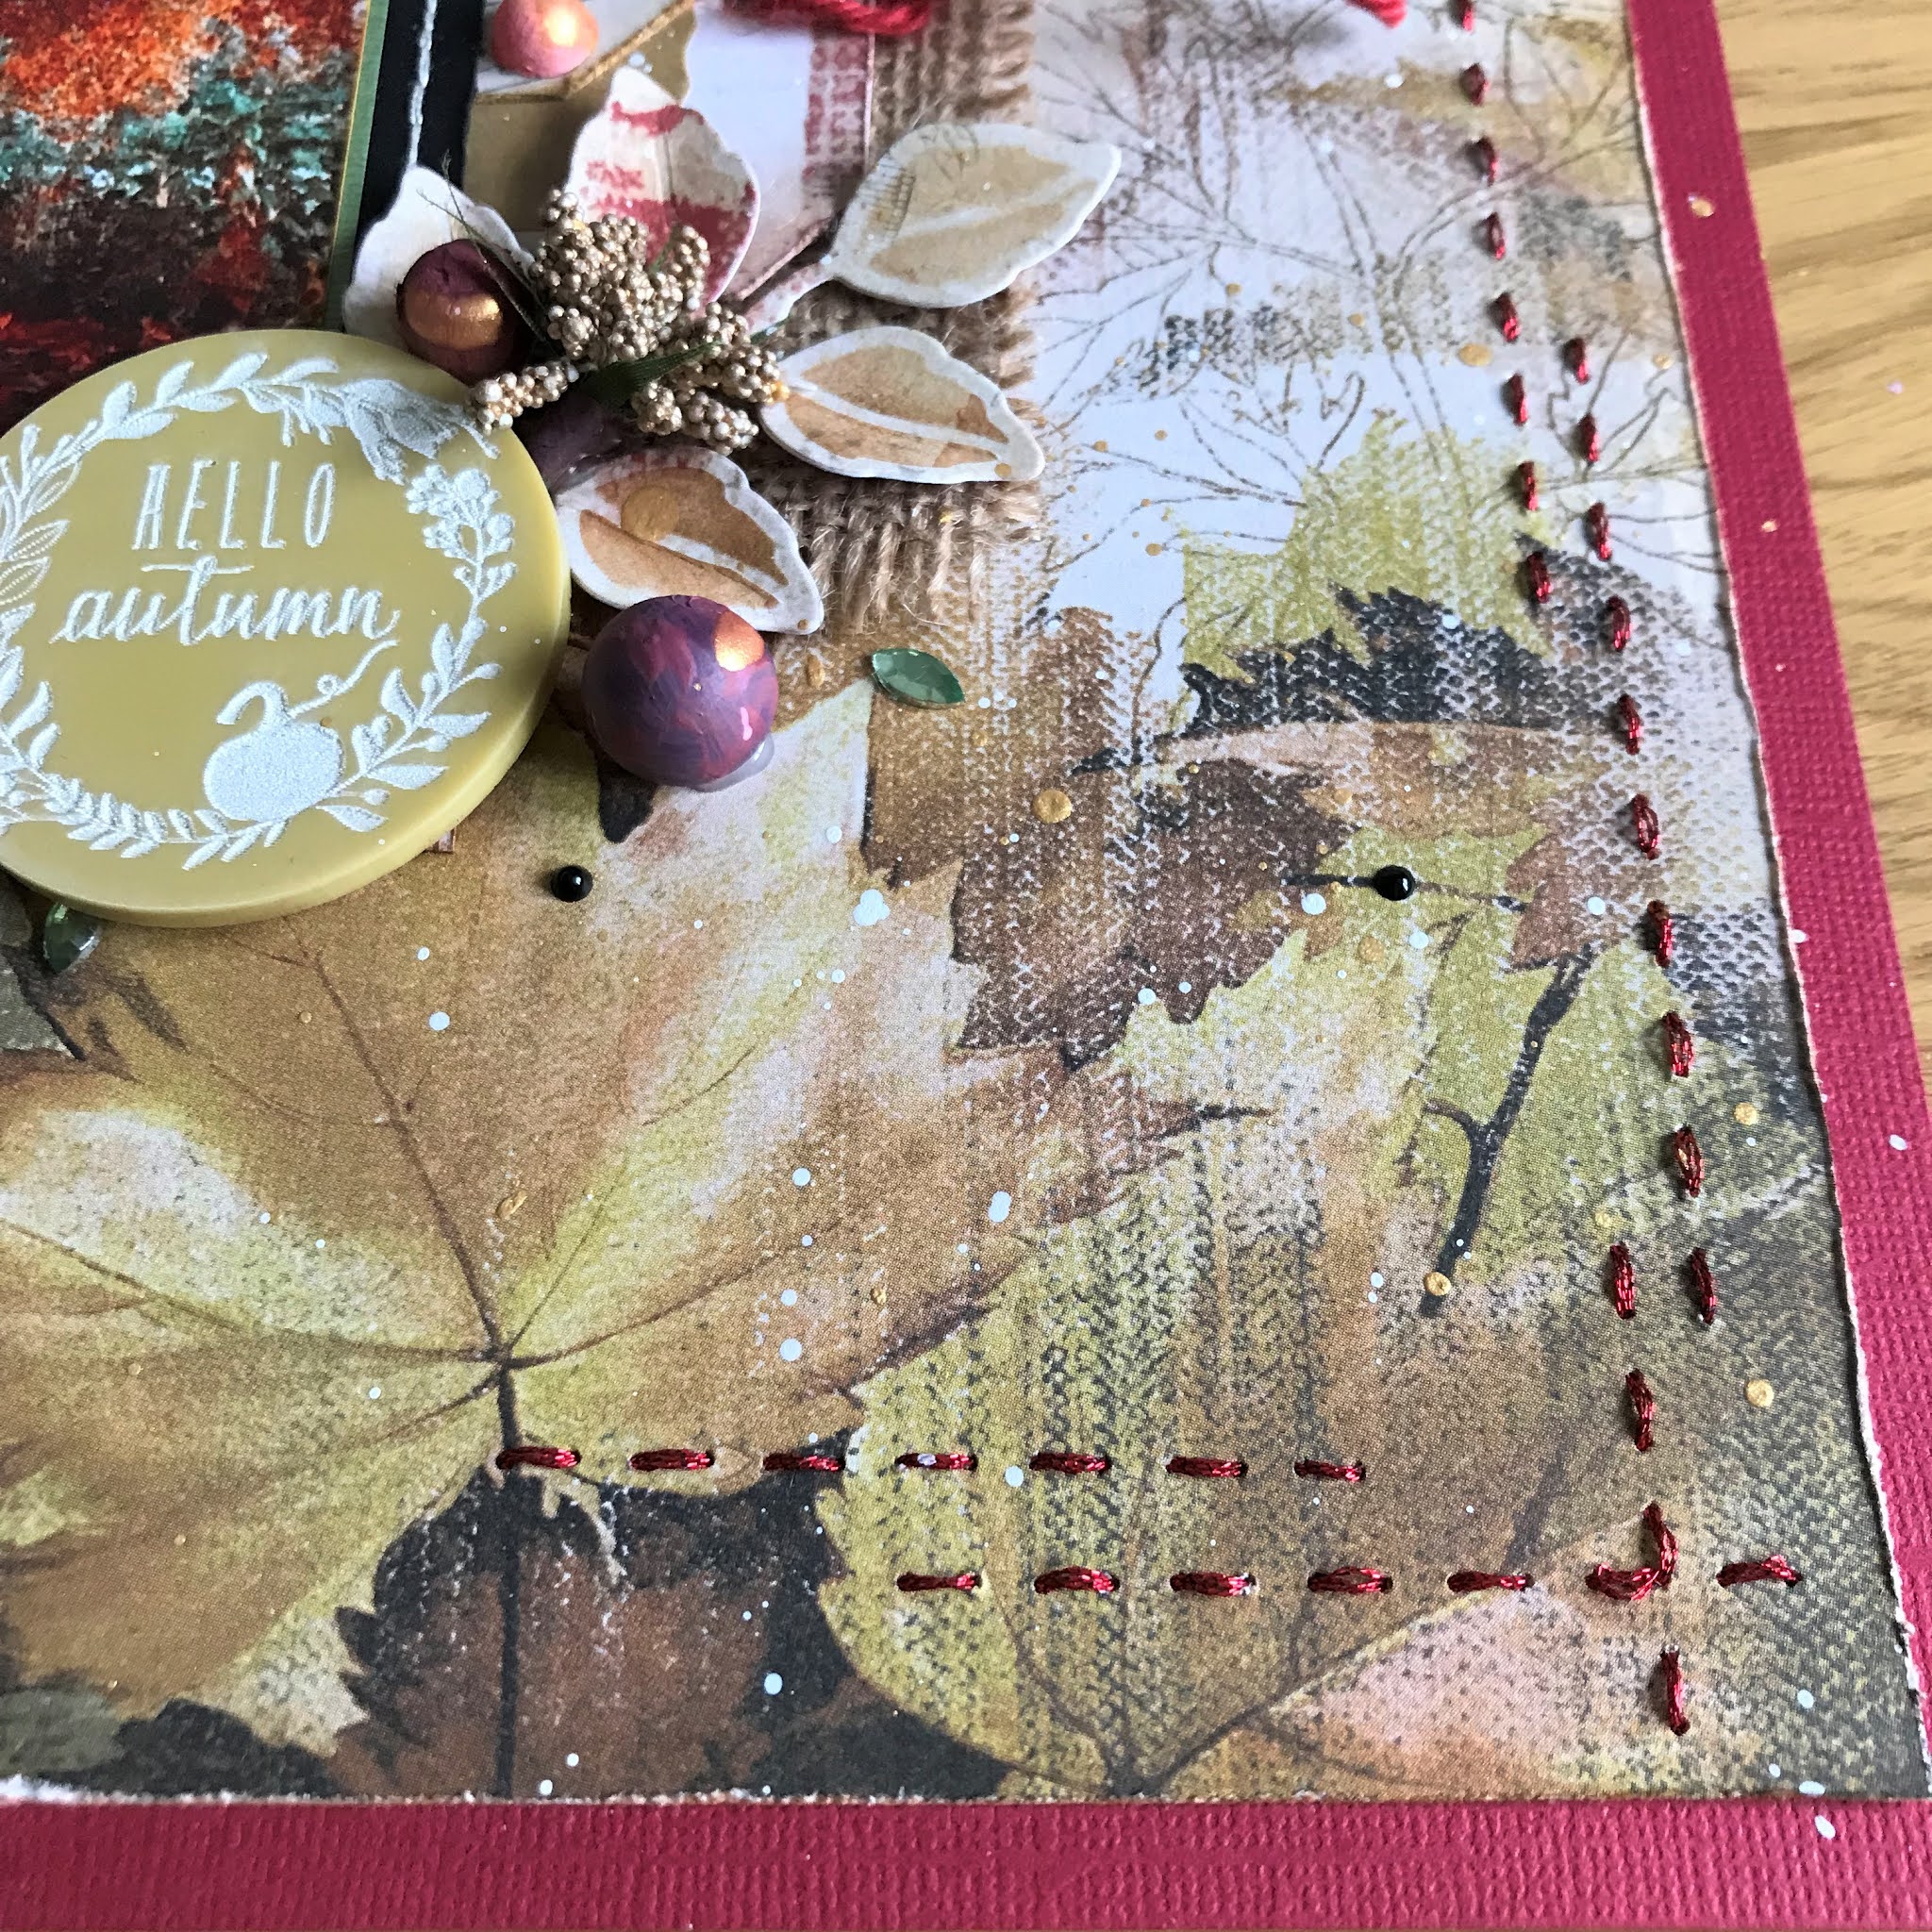


Over here on the left of the photo I have used the beautiful new vintage-artistry-in-the-leaves-foliage these are amazing! I've lifted some and others not. I have also added more leaves cut from other papers in the collection and then flowers from 49andmarket which here are royal-posies-tomato, enchanted-petals-parchment and ginger-mini series.

You will also see I have added other things to the layout. A mushroom, green gems, finnabair-melange-art-pebbles-clear which I coloured with reds and orange inks into gesso-white . I have also added 2 new to me products bramblefox perspectives. I just love that disc at the bottom right. I also tried a bit of splattering in gold and white and to finish black Nuvo Drops.

Thanks for stopping by today, I hope you like this and will join in with the challenge as well as a bit of shopping instore.
Take Care
Sue.
Hello!
Today I'm sharing a card I have made for the The Mad Scrapper blog using some beautiful papers by Cocoa-Vanilla-Studio. I am using a mix of papers from two collections.

It's a 7x7inch white card base, to which I added flat a piece of pretty-posies. Then I took a smaller piece of These Days from These-days-collection-kit and on top of that I added a smaller piece of Wall of Fame but the other side showing this pretty peach. I stitched around 2 corners and distressed the edges and added it to foam before attaching it to the card base.


Hello!
Here I am today sharing this cute Halloween Hanger for themadscrapper blog, I'm using one of those inexpensive ply pumpkin shapes which I picked up in a bargain shop for a £1.


