Friday, November 15, 2024

Pinkfresh Winter Berries

 Hello,

Today I am sharing a cute Christmas card I have made for the The Mad Scrapper Blog using the Pinkfresh Winter Berries stamp, stencil and die set.


I started by stamping out the stamp set twice and then using the stencils I decided to use bright non traditional colours as I was inspired by Rachel Designs from the Pinkfresh design team.


The die is one complete die which cuts out in one pass which is wonderful and time saving. I took a white card blank in 5x7 and on to that I added a pale blue matt which I ran through a embossing folder. Then I took a white smooth paper and added a light grey ink through a stencil cutting it in a scooped bottom and placing it on the card.


I also cut out some leaves using white glitter card, you can just make out the stencil in this photo 


The stamp set has 3 sentiments included and a die which cuts out one but I chose to use the long one and cut it out myself. To finish off I added blue gems and a little bow at the top.


I had these 3 pieces left over so I made a little coordinating tag. The Merry Christmas is another of the 3 sentiments. 


Thanks for stopping in again today. Don't forget to checkout other Pinkfresh items Janine is stocking by going to The Mad Scrapper  there is so much new stuff arriving daily.

Sue.

Supplies used :
Pinkfresh Winter Berries collection


Monday, November 11, 2024

Falalalala

 Hello,

Today I am sharing a layout for The Mad Scrapper Blog and I'm using a great collection from Simple Stories which you can pick up in store called Boho Christmas Collection Kit 12"X12" . It has some wonderfully whimsical images on the papers and sticker sheet. The photo was taken last year on the Christmas carousel and I thought it would be fun to use circles on the layout today.


I started by cutting down the white card to 11 inches and distressed the edges. Then I took the spotty paper and gutted out the centre for later and matted the white on to it. I wanted to add something to the white so I pulled out 3 distress inks and added random circles and some branches with berries. A full list can be found below.


Then using lots of different Rub-ons around the layout but this I just love. If you still have this one in your stash it would be perfect for this year because it shows Christmas Day falling on Wednesday which it does 

I cut random size circles with different edges from the papers within the collection but I put my photo on to a candyfloss matt and tucked foam underneath for dimension


I took a selection of stickers and added them to either white or pink cardstock to allow me to move them around before deciding where they would finish up. I did also add some directly down.


This next photo shows the Rub-ons which I added along with the largest circle cut from the gutted spotty paper. I decided to stitch around 3 of the circles.


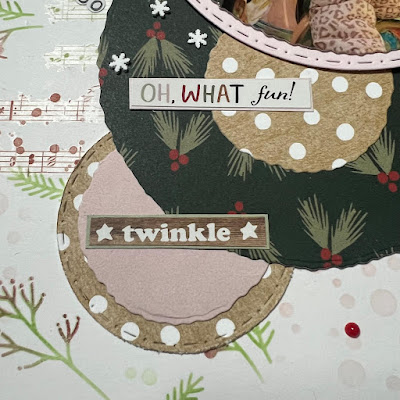
This shows closely some of the added stickers


Here you can see the whole layout and you can see all the extras I have added such as flatback sequins and Nuvo red drops. It's quite a busy layout for me but I love it and I hope you do and that I have inspired you to try something different too


Thanks for stopping by do check out all the lovely seasonal papers and collections Janine has in store or go to The Mad Scrapper  and look at your leisure.

Sue.

Here is the supply list:
Bazzill  Marshmallow 
Evergreen Season Sentiments Rub-On Transfers   I used Holiday Wishes from last year but these have some great ones in the pack.


Wednesday, November 6, 2024

Pumpkin Decorating

 Hello,

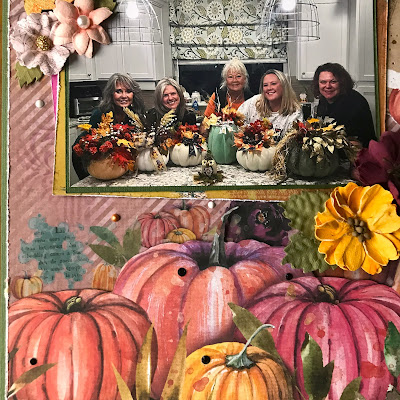
Today I am sharing a layout of a recent pumpkin decorating get together at my cousins house. The layout can be found on the The Mad Scrapper Blog . I have used papers from 49 and Market along with flowers and rub-ons and other items from the store, a full list below.


I have used Terracotta paper 1-B side and stencilled through with distress inks, I fussy cut the row of pumpkins from the Spice sheet and added a thin cardboard under for a little dimension. Before attaching it down I added a selection of Rub-ons, I also trimmed the page down distressed the edges and mounted it on to a dark green paper.

Here you can see I have matted the photo on 2 papers and tucked underneath a shocking pink paper which I have given a notebook top. The small cluster is made up of Prima and Green Tara flowers with a Dusty Attic Jack o Lantern which I painted in gold and sprinkled on orange glitter.


A little close up of how the photo sits above the row of pumpkins.


This photo shows the use of 3 journal cards saved from a Prima 31 Halloween collection which Janine stocked (you may still have some if you purchased too) I tucked them under the photo and added more rub-ons around them. I also fussy cut the pink pumpkins and added those. The ticket that the Bunco title is on is another journal card too.


This is the main flower cluster a mix of 49and market blooms as well as another Jack o lantern.


To finish off the layout I was going to paint splatter but I'm not very good at it so I added a mixture of glue drops and tiny black gems. All the pumpkins bar the tiny one in front are man-made and can be dismantled and stored for next year.
Thanks for stopping by, I hope I have inspired you today to use these beautiful rich coloured papers along with the plethora of flowers available from Janine. Call in today or go to  The Mad Scrapper 

Sue.

Supply list: