Friday, May 31, 2024

Lets Make Cards

 Hello,

I'm here today on The Mad Scrapper Blog with a quick post on making cards with Rubons.

Well what do you do with your rubons after you have used the ones you wanted on your layouts? I have a few sets in my stash with odd bits and bobs left so I thought I'd try to make a few cards with them. To be honest they came together quite quickly and I'm pleased with the results. These were the ones I chose to work with.


I started by making 4 card blanks in cream 2 were 5x7 and the other 2 were 41/4 x 51/4 I placed down a teal mat on 2 and a berry mat on the others. Then I cut another cream layer 1/2 inch smaller and added rubons all over and then I stitched around the edges. I put a thin card under for lift and added it to the card base.


Then I chose a selection of rubons and after putting them on card I fussycut them out.


These are the two teal ones some images are glued flat and others with different sizes of foam pads.


These berry ones I think are my favourites. You can see I have added white on black strip sentiments for a touch more drama!


Here you can see the hight I have managed to get along with finishing touches of clear gems.


Thanks for stopping by again today, I sure hope I have inspired you in what else you can do with your rubons?  Do pop in to see Janine and she will show you all available if you have none or go online The Mad Scrapper  

Sue.

Here is my list of supply's:


Wednesday, May 22, 2024

It's Pumpkin Time!

 Hello there,

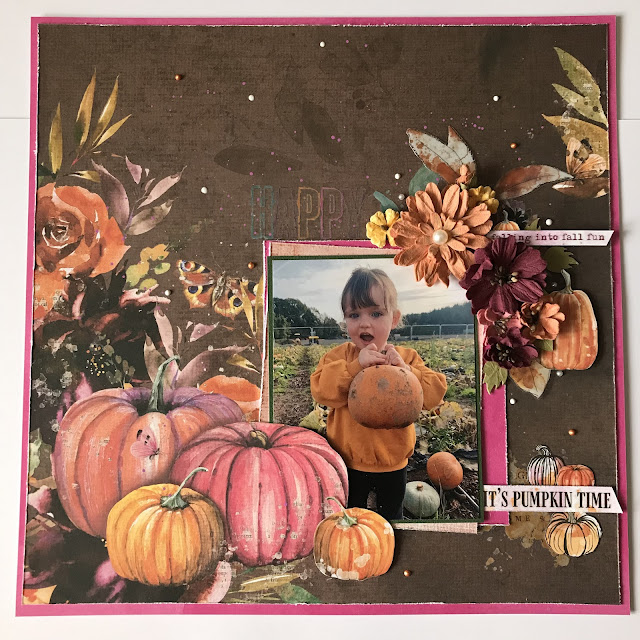
Today I'm up on  The Mad Scrapper Blog with this adorable layout of my niece's daughter attending her first Pumpkin Patch Pick. She did go the year before but she was only a baby still and unable to choose her own. I just love this photo, just look at her eyes.

I have chosen to use a 49andmarket Spice collection paper, there were several to choose from and I plumped for this beauty. I trimmed it by half inch and matted it on to the foundation 3 paper but not until I gutted the centre.


I had ordered the Spice rubons and still had plenty left so I added a few to the page before I did anything else. I also knew I wanted to tuck the photo in behind that big old pink pumpkin so I ran my blade around it. I matted the photo on green then orange and then the gutted pink, I tucked it in so the photo is straight but the layers on angles . Next I set about adding my flower cluster and more pumpkin rubons which I had put on to cream card so I could add foam beneath for dimensions.

Here we go with our clockwise walk around the layout. This shows how I tucked a couple of pumpkins in there as well as a strip saying.


Here you can see another strip sentiment which I lifted so I could tuck under more pumpkins.


This shows a rubon phrase I added above the photo. This one I decided to add straight down to the paper.


Here is a straight on look at the cluster, I used all 49andmarket flowers and leaves, even a couple of the acetate ones.


A closer look at the pink pumpkin and the added rubon one.


To finish off I added Nuvo drops in pumpkin and white and I was also brave (for me lol) and I splattered in pink acrylic!!
Thanks for stopping by today, as you can tell I am not a chronological scrapbooker so you may find autumn layouts in spring!  Janine has all the papers you will need for whatever season or occasion you maybe scrapping at this time so do pop in to the store or visit The Mad Scrapper  you won't be disappointed.

Sue.

Please find my list of supplies:
I used Art Options - Spice Russet paper which has sold out but you may already have it but as I said there are others still available.
I also used Rustic Bouquet in Marigold also sold out but lots more to choose from including ones from Green Tara 


Wednesday, May 8, 2024

Lets Celebrate

Hello,
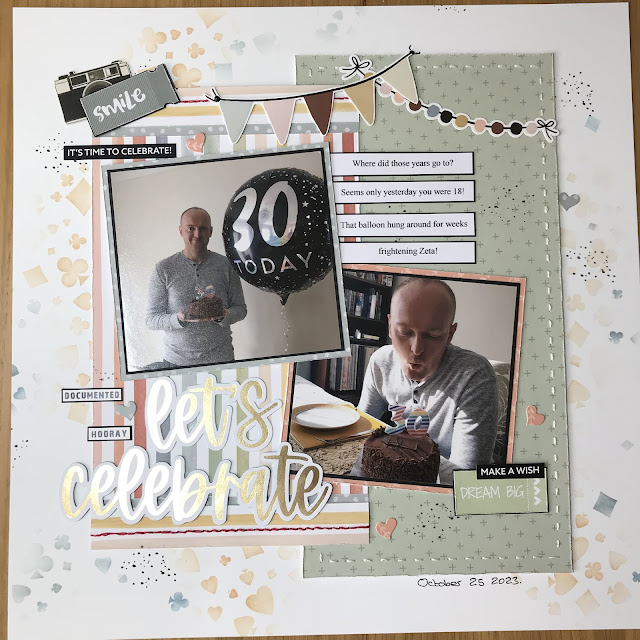
Today I'm up on the The Mad Scrapper Blog with this layout of my son on his birthday last year. I have chosen to use a few papers from the Heart and Home collection by Cocoa Vanilla Studio  I have also used a sketch to help with the layout this is helpful if you are in a bit of mojo fog.


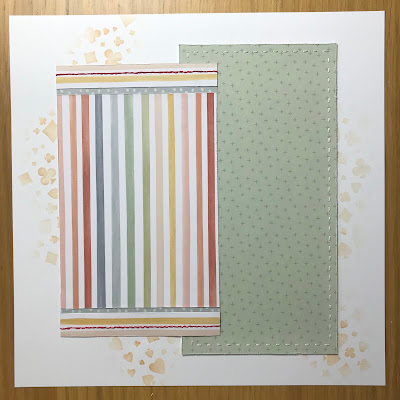
I started by taking a sheet of coconut swirl and added images from a stencil by The Dusty Attic  using Tea Dye and blue ink. I then trimmed down 2 sheets of the paper one 5x10 and the other 5x7 I also added 2 strips of the same paper but twisted to the top and bottom of the shorter piece. I  stitched around the green with white floss and the strips with a rusty red.


Here is a closer look at the stitching and twisted strip.


I matted my two photos on to black and then on to the papers I have used above and distressed all edges. I decided to add at a jaunty angle. In the next photo you can see I have added 2 banner stickers from Boho Baby collection as I thought they matched the papers. I also added my journaling typed this time and matted on to black too.


I have used little snippets around the paper. The 2 tickets were gifted to me and I thought were perfect for my photos.


I have used one of the collections Gold Foil titles, there were so many to choose from. I did ink the edge with blue to help it stand out, it is also lifted slightly.


In this next photo you see the other ticket with a fussy cut camera tucked behind, my son loves taking photos and makes films/shorts doing magic and a lot of time with packs of cards, now you see why I used the stencil I did.


To finish off I used a stamp which adds black splatters around the page and added a few die cut hearts. Thanks for stopping by today, I hope I have inspired you to make a layout this week and if you need some new papers pop on over to see Janine in her shop or online at  The Mad Scrapper  she always has great collections to choose from.

Sue.

Here is a list of supplies used
Fernwood - Focused --- Fussy cut camera