Wednesday, January 17, 2024

Pumpkin Patch

 Hello,

Today I am up on The Mad Scrapper Blog with this Pumpkin Patch layout.


I started by taking a sheet of coconut swirl and then 3 sheets of Cocoa Vanilla Heart & Home paper. I cut 4 by 10x1 strips of harvest but you will use both sides. Then 4 by 10x1 strips of leaf litter again you will use both sides and finally I cut 2 by 10x1 strips of bountiful.
Each 10inch strip cut to 5inch, distress all edges then lay on the white cardstock mixing them up this will give you 4 5x5 blocks. Stick down and if you'd like to add more definition stitch down some of them as I have done.


You can just see the stitching here on this next photo.

I took my 2 photos and matted on to green Bazzill cardstock and this one below I added a orange to patch Jack's hat.


I fussy cut lots of flowers and leaves from the  Bountiful paper and after lifting my 2 photos with foam I proceeded to tuck them under giving them some lift with skinny foam pads. I made the one big cluster at the top between the photos and a smaller one at bottom right.


I made sure that some blooms came off the edge on to the white. I have also used puffy heart stickers around the page.


The title is from the pack called Titles with gold foil and I have cut words from the Golden Field paper (there is soooo much on there) to finish off. The couple of extra pumpkins are from my stash.


Thanks for stopping by today do go checkout all the lovely paper collections Janine has over at The Mad Scrapper  and I'll see you next time. Happy New Year!

Sue.

Please find the list of supplies I have used today:
                                                     HEART & HOME – LEAF LITTER 
                                                       HEART & HOME – HARVEST 
                                                 HEART & HOME – BOUNTIFUL PAPER 


Wednesday, January 10, 2024

Christmas Box

 Hello,

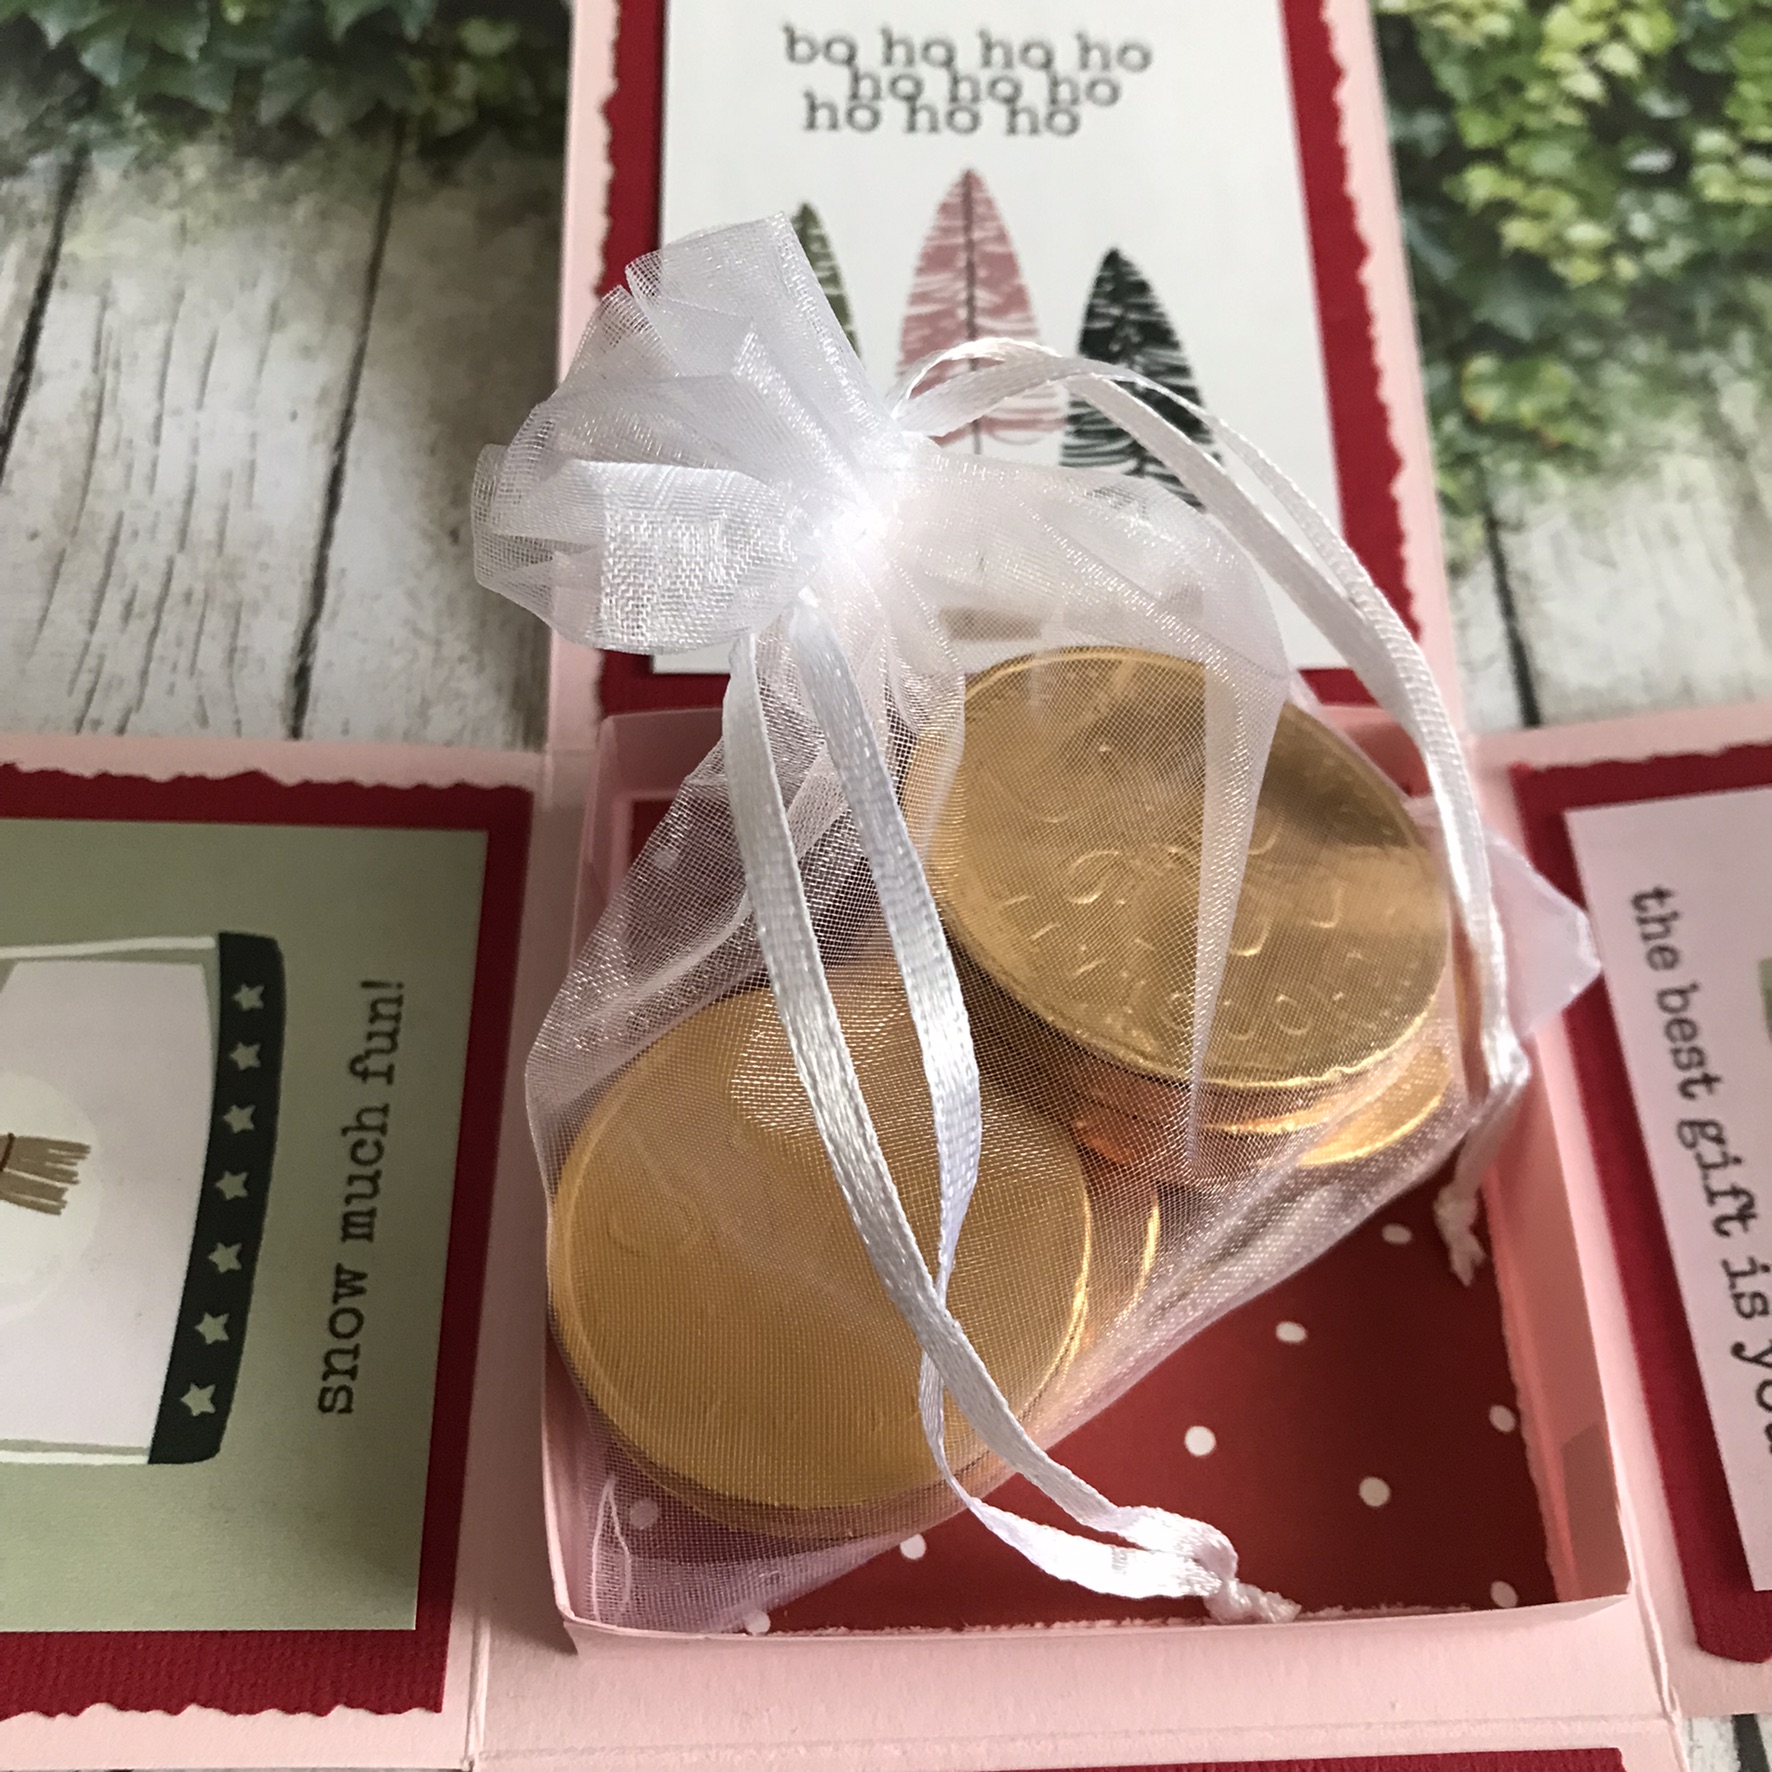
I'm up on The Mad Scrapper Blog today with this Christmas surprise treat box. These are so easy to make and lots of fun for the recipient. You can make it double lined but this time I chose not to as I wanted to add some sweet treats to the centre.


I started with a sheet of candyfloss scoring at 4 and 8 turned the card and again scored at 4 and 8. I burnished all score lines and then removed the outside squares to give the the design as below. You can see I have made a 1 inch deep box for the centre but this is a 31/2 to allow the flaps to come up.


Then I took a paper from the Boho Christmas kit and added it the outside flaps. I chose the Falalala one as I thought it to be fun. I took images from the journal paper along with stickers to add on top. I also made a lid for the box and put paper inside too. All these additional layers will give the box strength 


To the inside flaps I first cut up cherry splash and used deckle edge scissors to give a more playful look and on top of that I used more images from the journal page. You can see I have lined the inside of the shallow box and you also get a glimpse of the lid too.


I added some glitter ribbon to the edges of the lid (again strength) There are so many lovely papers and stickers in this kit it's hard to choose!


Here you can see I have added a little bag of chocolate coins you could add what ever is age appropriate for the recipient 


Thanks for stopping by today, I hope you get chance to make one of these as they are lots of fun. Janine has lots of different papers and kits you could use so pop over to The Mad Scrapper  and find one that suits you.

Sue
Here is the list of supply's I used:


Monday, December 11, 2023

A Great Day

 Hello,

Today you can find me over on  The Mad Scrapper Blog with this layout of myself celebrating my 60th birthday with my best friend Julia having  afternoon tea. We had a lovely time.


For this layout I have used 2 beautiful papers from Maja Designs a full list can be found below. I started by ripping an inch from all sides of the sunshine paper and then I inked through the Tapestry Stencil with Walnut Stain distress ink, I have also added some stitching on 2 corners using bright olive green floss which is very similar to the chair I'm sitting on. You can see from the photo below I have inked the larger of the frames and then snipped apart because the photo is 4x6.


In this next photo you can see I have added 2 mats to the photo before adding it on top of the frame.


Then I start to make my floral clusters using Prima and 49andmarket flowers. I cut apart some of the sentiment strips to add along with fussy cutting a few teapots which are on the opposite side to the brown paper used for the frame.


Here you can see the other smaller cluster which I tucked a balloon chipboard in to which I coloured first with Archival ink. A few more teapots and some Nuvo drops were added.


This photo shows a couple of images of the stack of food we had to eat along with a decorated plate and that's my friend Julia who took me. I tucked a little tag under the photo with some journaling on it. Oh and I made sure not to rip the little sentiment off the bottom of the yellow paper.


Thanks for stopping by again today. Do go over and see all the beautiful papers both new and older collections Janine has ready to tempt you with.   The Mad Scrapper  if you can't make it in to the shop itself.

Sue.

Here is the list of items used :
Boxed Flowers - Noted   These can be coloured using any of your inks
Wildflower Collection Kit 12"X12"  I used the tag and the tiny sentiments from the sticker sheet.
49andmarket Rustic Blooms in Marigold
Nuvo drops


Monday, November 27, 2023

Beamish Day Out

 Hello,

Today I am up over on  The Mad Scrapper Blog with this layout of a recent day out at Beamish Living Museum in the North East of England.


I decided to use a couple of papers from Simple Stories Boho Baby collection along with some stickers. As always I like to add some stitching to my layout so after I had ripped my papers I did a running stitch using white and mustard threads.


The two photos of the girls are on a single mat and the one of Eleanor on her own is double matted and a little smaller too. The girls went in the school house so I chose to use the stickers of the ABC and the camera was perfect to reflect the smiles

They girls got to have a ride on the bus which went down well judging by the smiles. You can see more stickers used and you may just see my attempt at paint splatters, I used gold acrylic paint.


A few puffy hearts are dotted about the page along with little fussy cut stars


A closer look at the ripped paper and some splatters.


Here is Eleanor trying her hand at a hoop and stick she is a little star.


Thanks for stopping by today, I hope I've inspired you to try something different with your papers. These maybe from a baby collection but you wouldn't know.
Pop in to the shop to see what other goodies you can find or if you are unable go online The Mad Scrapper  Janine will be happy to welcome you either way.

Sue.

Here is the list of items used today:
Simple Stories- Boho Baby Twinkle, Journal Elements and sticker sheet.
Cocoa Vanilla Designs- Puffy Sticker hearts
White and mustard embroidery floss.


Friday, November 10, 2023

Jolly Christmas Memories

 Hello,

Today I'm up on the The Mad Scrapper Blog with this festive Beyond the Page Christmas memory book. 


I have to say straight away that I've had this MDF book for quite a few years and I know Janine has not got any left but you can still get a similar one from her. You will find all supplies listed below as well as the book. Mine comes with these huge ring clips but you could thread twine or ribbon through instead.                                                                                                                                                                                                                                                                                   I have used the Simple Stories- Boho Christmas collection to cover each page and also made good use of the sticker sheet too.


Instead of showing you loads of photos I have a few collage shots to share of the pages and how I have covered them. I also made 3 extra pages from card just a little smaller than the original ones.
On the inside cover I have added a journal paper for notes and facing it I have the 2 mats for a photograph and on the other side a hidden tag for notes with another photo mat on the next page.
On this first photo you can see I have added 6 gift tags cut from the papers, one side has a pattern and the other side is plain so I added a To and From stamp so they can be used. Another photo page and on the reverse a place for a list with another photo page opposite 

Again more space for notes and photos on these next pages.

This photo shows the last page and the back cover. The Be Merry is a sticker which is raised to allow the photo to be tucked under if needed. The green plaid finishes off the back board.

This just looks so wonderful standing up there. You could add ribbons and thread or twine to the rings if you so fancied.

All throughout the book I have inked the edges and distressed where appropriate, all the holes for the rings have strengthener's on them, I have only added from my stash a little ricrac ribbon, some gems and some white Nuvo drops everything else is from the collection.

I hope I have inspired you to pull out any of your MDF books or to stop by to see Janine to see what she has or go online  The Mad Scrapper

Sue.

Here is a list of supply's:


Friday, October 13, 2023

Wildflower Cards.

 Hello,

Here I am on The Mad Scrapper Blog today sharing 4 cards using the recent release from Simple Stories working along with My Minds Eye called Wildflower. I'm not showing how I made these just the finished articles. 

Here are the first 2 and I have chosen to make DL style cards for these two young ladies.


I have used the same pink gingham as a base layer on both  distressing the edges before sticking them down. I have added a Touch of Pink panel with the opposite side to the gingham on it and then a cut apart card to 2 mats picking up the colours in the paper to this card adding it in a jaunty angle. It has foam under for dimension which allows me to tuck under flowers from the pack along with some I have fussycut. I added 2 stickers from the sheet as well as a stamped birthday sentiment and a few pale pink pearls.


To this base card I have 2 layers one from Coastal and the other from the opposite side of the gingham and to that I added another trimmed down cut apart. I added a little bit of lace to the panel and a small cluster of flowers. I die cut the 21st using a cut apart piece I knew I wouldn't use so the colours all work. Again a few pearls to finish.


Here are the next pair and these are 5x7 side opening cards.
I have made another birthday and this time a thank you card. I have utilised the coastal paper for matting on both cards.


This card has a layer of vintage pink paper from Maja Design first with its distressed edges, then a slim panel of coastal with the pink bowing cats on it, I was able to cut it so you see 2 cats together. On top of that I added a circle then doily and then a cut apart giving the sentiment. Around one side I added flowers and leaves from the flower pack. I stamped my own sentiment and finished with pearls.


This next card has the pink butterflies matted on to the coastal paper, on top of that I added the big fussycut bloom which was lifted for dimension at the top allowing me to tuck under smaller flowers. I die cut the Thank You and again to finish I added gems this time around.


I hope I have inspired you to try and use up some of your papers this way. They really have come out better than I expected, so very pretty.
Check out other collections Janine has in stock at The Mad Scrapper  there are some beauty's.

Sue.

Here is a list of supplies used:  


Wednesday, October 4, 2023

Sweetheart

 Hello,

Today I'm sharing a 8x11 layout with you which I have used all supplies from The Mad Scrapper  on. The layout is of my cousin and her granddaughter on a recent visit to Mount Rainier in Washington State.


I have gutted out the centre of the green paper (a full list below) and taken the opposite side of Blossom paper and stitched around using black floss. Then I added a selection of Rub-Ons to fill out the paper. Before I attached them together I distressed all the edges.

I did a simple mat using the green behind the photo and the A side of the blossom paper.


Here you can see the main flower cluster from a selection in the store along with some acetate leaves. The sentiment strips were gifted to me from my cousin in the photo.


To finish off the layout I have added Kaisercraft gems and pearls.


A little closer look at the flower cluster.


I hope you have enjoyed this layout today, pop over to The Mad Scrapper  to pick up your supplies and say Sue sent you!

See You Soon.

Here is the supply list:
Vintage Artistry Rub-On's in Butter & Lilac, Everyday Essentials and In The Leaves Foliage
Kaisercraft Rhinestone's in Purple and Lavender Pearls