Saturday, April 16, 2022

No Ordinary Day!

 Hi,

Today I'd like to share a layout I have made of my son doing his favourite thing which is performing magic. On Red Nose Day this year he put on a small performance at his work place (his day off) for customers and staff.


For this layout I have used the wonderful No Limits Collection by cocoavanilla.com which I picked up at themadscrapper.co.uk . I gutted out the centre of spark paper and then chose a white bazzill and to that I added some stencilling using Bramble Fox #28 using distress inks, I also used the heart and the star stencils by Tim Holtz. On the photo below you can see them a little better. You can also see a couple of tags I made and to that I added a little saying. The big black super-star is by bramblefox.co.uk  and they come in 4 different colour choices.


On this next close up you can see I have cut out 4 playing cards from a 12x12 paper I had in my stash and I have tucked them in to a tiny strip of paper with the globe cut from the  universal page along with a paper-snips-001banner


Here you can see another star and a the perspextive arrow which was from one of this years FoxBox subscriptions. The Snapped and Yay it's Friday are Paper Snips I had to place that one there to hide the 2 customers.


A close up of this perfect sentiment from the universal sheet.


Here you can see I made up a little stack to mount my photo on to, I tucked strip of card suits down the side and added the little "bulldog" style perspextive to the top.


Thanks for stopping by today. I hope you feel inspired to grab your papers and play. I've added links where I can.

Sue.


Monday, April 4, 2022

Autumn Walk!

 Hello,

Today I share another layout for themadscrapper.blog and this time it is using beautiful papers, rub-on's and leaves from 49-and-market along with a stencil from the-dusty-attic and the title is a bramblefox  perspextive.


I have taken the b side of Seasoned and used a tree bark stencil to add gesso to the top right and bottom left, which when dry I brushed over some metallic bronze paint and then went around with some distress ink. I decided I wanted to add a boarder so I cut it down to 11&1/2 and mounted in on to a saved piece of Enjoy Today by Maja Designs.

I love to watch the YouTube video's that 49andmarket put out and I picked up the idea of mounting a slice of another paper across the centre of the page which I have done here using the b side of the journaling cards. You can see below how I have added ink through the leaf stencil and then drew around using a fineliner pen. The idea is not to be exact, I also inked the distressed edges. I don't throw anything away and so I tucked a small amount of Splendor behind along with some cardboard for lift.
You can also see I love to keep and use the manufacturers strips and the mushrooms are from Hike More-Boscage paper.

I have made a tag from a cut off and again used manufacturers strips both at the top right and tucked above the centre panel. I have also painted a piece of paper with the same metallic paint and used the stencil again to make my own leaf sprigs.


Here again is another strip being used along with some Perfect Pearl's in green and pumpkin. I matted the photo on bazzill paper in carrot-cake.


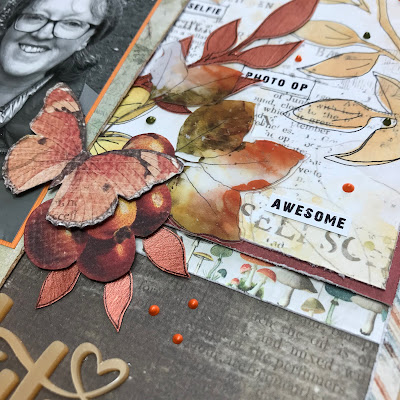
This next photo shows you the leaves I made along with the Rub-on's and the beautiful acetate leaves.


The little tag finished off with some brown ribbon and a couple of scraps finished with my notebook punch.


I made a couple of flag style banners and used a paper-snips on there too. Youcan just see a little of the Rub-on text there.


This is a closer look at the title, a beautiful perspextives


I really enjoyed making this layout and I hope you enjoy it too. Thanks for stopping by and please go over to www.themadscrapper.co.uk to check out all the lovely goodies Janine has in stock. There is a full list of what I have used below.

Sue.


Tuesday, March 22, 2022

Happy 18th

 Hello,

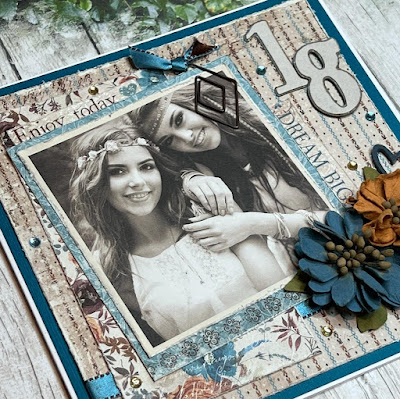
I'm just sharing a card today I have made for The Mad Scrapper Blog using some more of the beautiful bohemian-harmony-12x12-collection papers.


Did I tell you how much I LOVE them lol. I have teamed them with flowers from 49-and-market , gems from  kaisercraft some ribbon and a charm from my stash.


The flowers are rustic-bouquet--marigold and bluejay they are so beautiful. The charm was gifted to me by my sister (thank you Bev) and I added it with bakers twine. The ribbon was a perfect match satin with a brown saddle stitch. I also added a perspextive heart in a deep blue.


Here you can see the gems along with the 18 which I cut using my Cricut. On the back of the manufacturers strip they print cute text and I have used 2 different ones just tucked under the photo. I also added a cute paper clip with a touch of the ribbon added to it.

Here is a list of the papers I have used today

Thanks for stopping by today, you can find all the papers listed along with the flowers and a selection of gems over at www.themadscrapper.co.uk or if you are lucky enough to live close then pop in to the shop to say Hi.

Sue.


Monday, March 14, 2022

Fun in the Sun!

 Hi!

Here I am again sharing a layout for The Mad Scrapper Blog and today it's a fun layout using a sketch by Sarah Packer for the February GoGo Cyber Crop. Unfortunately I was too late to join in on the day but wanted to use the sketch. I have also combined it with Niki's Moodboard from the same crop. 


Here is the sketch I followed and the moodboard. These sort of things are great to kickstart your crafting day especially if you want to try something new.


   I have been wanting to use my 2 photos for a while and so I chose to use the b side of  vintage-artistry-beached-journal-cards along with Sunkissed-fun-in-the-sun and Feelin Fine by cocoa-vanilla-studio. I cut strips 1inch wide from the papers and distressed the edges and placed them down and then I decided to stitch using lime green and peach thread along the edge finishing with a bow.


I chose one of the journal cards for my title, trimming it down to fit on top of another. Then I went through the 49-and-market/vintage-artistry-beached-ephemera-bits and pulled out flowers, flipflops, starfish, frames, tickets and sentiment diecuts.
This next photo shows that sentiment which I matted on to a Yellow Bazzill card using a fancy edge die. Also you can see a couple of the sweethearts from the February Fox-box.


A closer look at the photo frame and bus tickets along with a cute camera diecut and a flamingo! I know in the photo I'm all smiles but by the end of the trip I hated it.


We were in Turkey on our first holiday there and we were paddling our way to a mud bath and picnic lunch, they were both great fun.


You can see I added some distress-ink in mustard-seed around the photos, then to finish off I used glossy-accents like water drops and some gold Nuvo drops.

Thanks for dropping in again, I hope you can pop by themadscrapper.co.uk to see all the cool stuff or maybe if you're lucky enough you could call in to the shop itself.

Till next time, take care.

Sue.


Thursday, March 3, 2022

Lord of the Dance

 Hello,

Today I'd like to share a layout I have made for themadscrapper.blog. I have also made this for my Brother-in-Law as it is his late father who was a champion Irish Stepdancer as you can see by all the medals and cups in the photograph. The photo is one of my favourite that he shares with us and I was so pleased he allowed me to use it.


For this layout I have used the b side of North pole by 49-and-market which I cut down and then matted on to a piece of bazzill-basics/patch which is a lovely green. I then added a grey mix of Gesso I made up through my favourite stencil-6x9-iris-tapestry when dry I added distress-ink-tea-dye and black-soot through a Kaisercraft mini stencil. I added a strip of paper and a strip of music paper through the centre tucking under some vintage lace.


I made my stack behind the photo first (something I picked up from one of the 49andmarket DT's) this made it easier to place. I used 49-and-market-essential-4-6-file-frame-set along with vintage-artistry-collage-stack I added chipboard last and to that some cheesecloth 


This next photo shows the ticket you needed to get in to the Special Event held at Earls Court on St. Patrick's Day 1939 where Maurice was dancing with his sister Maureen O'Connell along with others from their club against members arriving from Ireland.


Once I had placed the photo and ticket down I set about adding my embelishments flowers by 49-and-market in parchment , bluejay and ocean-jade along with a couple of bus tickets out of the Christmas Ephemera pack. I added a rosette charm and some pearls.


I found what looked like a clump of 4 leaf clover on the 49-and-market-rub-ons butter collection and added them to the bottom.


I printed out some words used to describe steps within the dances and a sentiment for the top of the page which was copied from a Kaisercraft sheet of paper.


Here you can see I have added another charm, this time a 4 leaf clover on a piece of green waxed cord nestling flowers around it


I have added sequins, pearls and gems around the page all in greens. I also made a little frame and tucked in it a smaller copy of the ticket along with a musical flourish and a couple more tabs. Then to finish off I added 2 hearts Perspextives one grey above the date and the other is tucked by the bus tickets.


Thanks for stopping by again today. Please leave a comment as it's always nice to see who has stopped by. Don't forget to drop in at themadscrapper.co.uk or better still call in to the store itself.

Take Care

Sue.


Friday, February 18, 2022

Birthday Box.

 Hello,

It's my turn to share a project over on The Mad Scrapper blog today. You know when you get that one piece of card left from a kit or collection and you don't know what to make. Well I hope this project will inspire you to create something.

                             
This next photo shows the main lid


I started by taking my 12x12 sheet from the tartan collection and scoring at 4inch and turning and scoring again and turning until I've scored 4 times. Then I removed the 4 corners and gave all lines a firm press down. Keep the removed pieces for future use.


You can at this stage make another slightly smaller box to go in the centre using a card of say 101/2sq and scoring at 31/2 doing the same as above but I chose to make a box with sides of only 2inch high. But I needed to make 2 lids so I took in this case black cardstock and cut and scored as it says in the photo below. Make up as normally for lid making.


Once these parts were made I went ahead and embellished the insides and lids. I cut out 2 doily's in watermelon and 2 in smooth cream card. I also cut out a few bows in the same. For this first panel I added flowers from prima and leaves from a pack of 49andmarket flowers as well as fussycut items from simple stories.


This next photo shows the big bow and more flowers as well as the black and pale pink gems


A simple Happy Birthday die cut was used here cut in the watermelon 


This next photo shows the lid of the inside box. I made it in black and used one of those cut away pieces on it and then I stamped a little sentiment and added another flower and leaf as well as gems.


This shows the inside of the small box which again I added a cut away piece. I don't know how I achieved the inside to match the lines lol. I will be filling this box with my gift as this box is for my friend.


I have added a short video of me opening this on my instagram page. Thanks for stopping by today, I hope you will go over and see the video and then look at your own collection of papers to see if you have one there to use, if not then pop on over to themadscrapper.co.uk and check out all the beautiful papers Janine has instock.
Take care

Sue.

Links for the items used today are as follows


Wednesday, February 9, 2022

Bohemian Harmony cards

 Hi,

Today I'd like to share a couple of cards I have recently made for  using the gorgeous Bohemian Harmony  collection of papers by Maja Design available at www.themadscrapper.co.uk. The collection pack has 12 double sided papers plus 4 coordinating plain papers and an extra sheet on the back of the cover. It is also available in a 6x6 pad too. But here I am showing that the 12x12 papers can be perfect for card making too.

This first card is for a New Job. I have covered the front of a 6x6 card blank with one side of the chosen paper and then used the other side for the top layer keeping the leaf in the top corner. I then stamped 3 sentiments making the largest into a tag which has been cut from a Magnolia Die, the 2 largest stamps are by Verve Stamps and the tiny one is from my stash. I added a Mini flower in cobalt and a acetate leaf both by 49-and-market. To finish off I added kaisercraft self-adhesive-pearls in denim and sand. Along with twine to the tag and a couple of brown tiny roses from my stash.


This next card I made for my Niece who just turned 21. This is a 7x7 card blank with the top edge of the front removed using a Spellbinders die showing the strip of paper I added to the back.


I started by gathering items I thought I would use kaisercraft Pearls again but this time I would colour the white ones with a brown Copic pen, I cut out some stars, a 21 and the a piece off one of the label strips.

I chose a image from the Snapshots page and mounted it on to one of the coordinating plain papers and added some blue lace from my stash. I cut a oval from Rustic-flowers and added it to the plain brown coordinating paper. You can see I have distressed all the edges.


Then on to make the front of the card. I took a piece of Feel Alive and removed the far right edge with the same die, I back stitched the edge with brown embroidery floss and added it to the card base. I took a small strip and mounted it on brown and placed it down on the left side. 


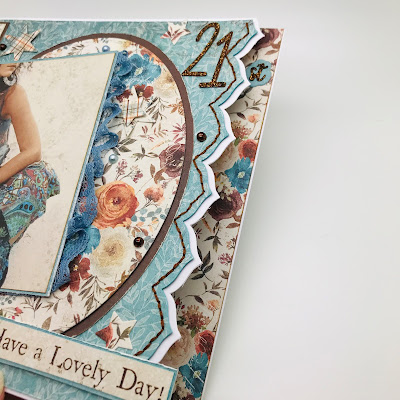
Here in this next photo you can a peek at the paper inside the card before the verse sheet goes in. You can see I added the 21 which I cut in brown glitter paper along with the st which I matted on blue and added to the back strip, I dotted the pearls around along with the stars and the Happy sentiment which hangs slightly over the edge.


Thanks for stopping by today, I hope this will inspire you to use some of your amazing papers for smaller projects too.

Till next time, keep safe.

Sue.