Friday, December 23, 2022

49andmarket Quick and Easy Christmas Cards

 Hello,

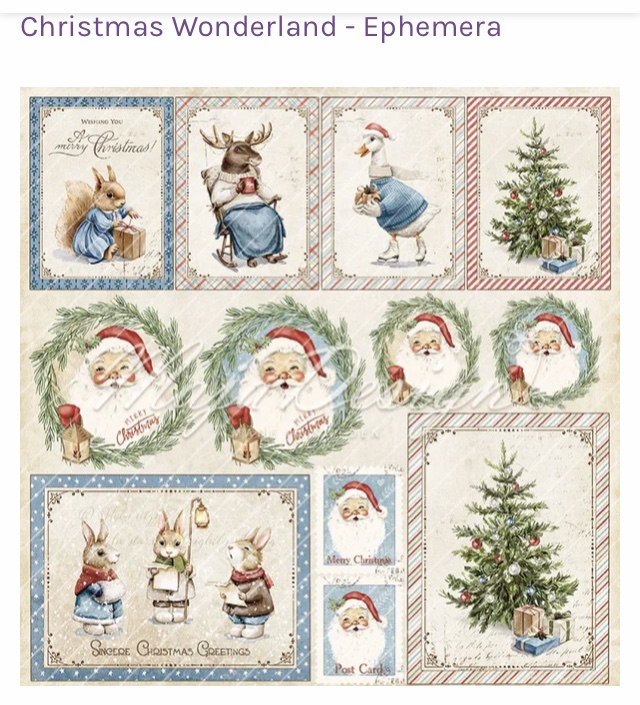
Just sharing some quick and easy Christmas cards using 49andmarket 6x8 Holiday Wishes collection pack on the themadscrapper/blog today.


These are all very quick to make and will post easily. The papers in the pack are devine and need very little extra to make a beautiful card.
I have added the coordinating rub-ons as well as some Nuvo drops and chipboard sentiments.


The card above and below just has a sentiment stamped on along with some drops. Both are tent fold and I have matted the paper on to a coordinating paper before adding it to the card blank,


The card below has a rub-on added and some drops and is double matted. I think the black mat makes it pop.


The next 2 cards are 5x5.5 in size and I've picked a burnt orange paper as the mat because it picks up the flower colour. This first one has a stamped sentiment and some drops


and this one has 2 rub-ons. One being the sentiment and the other the image on the top right. The bird is sitting on text I know it looks a little different in this photo but in real life it's lovely.


Thanks for stopping in today and don't forget you can call in or go online for even more goodies at The Mad Scrapper   Janine has loads with new things coming in each week.

Sue.

Products used available instore:


Wednesday, December 21, 2022

Simply Magical

 Hello,

I'm here again to share a layout made for The Mad Scrapper Blog and this time it's Christmas! I'm using a postcard which we bought on a visit to Mount Doria in Florida back in 2008. It is Christmas Moonlight by Thomas Kinkade.


I chose to use the new collection by Maja Designs which can be found in store, a full list of products can be found at the bottom of the page.
I trimmed the Believe paper to 111/2 sq so it could fit on top of the red as a contrast. This time I distressed the red. I stitched the opposite corners with green floss adding a few beads to the top edge. Then I added some Holiday Wishes rub-ons to pop from under the card. Before adding it to the red I inked the edges with Vintage Photo.


I added the postcard to a file frame and inked the edges too. I placed some cardboard underneath to give dimension. 


Here you can see how I have made two clusters to complement the card (I hope lol)


This photo shows the tiny trees and string frame I have used along with more rub-ons and flowers as well as the red hat pin which I purchased on the same holiday.


Another rub-on peeking out, more flowers and string frame here. The trees and frame I added white gesso and glitter to.


This title is a rub-on, there are so many beautiful ones with different fonts it was hard to choose.


I added some Nuvo glitter in snowfall to a few of the stars above Santa 


In this close up you can see a few gems I have added as well as the little "let it snow" button which if you have been crafting for a few years you may have bought some of these themed packets. I added some glitter to the flowers and leaves too.


I hope I have inspired you to use any postcards you may have picked up from a holiday because it doesn't always have to be a photo that you scrap. Thanks for stopping by again, I appreciate any comments left as I do read them. Till next time.
Sue.

Please find the list of products used available at   The Mad Scrapper .


Wednesday, December 14, 2022

O Christmas Tree!

 Hello,

Here I am today with another post for The Mad Scrapper Blog and this time I have used a MDF Christmas Tree shape which I have had in a draw for a couple of years just waiting for its time to shine!


I wanted to make something to give to a youngster, so I chose to cover it with paper and add baubles & bells on twine.  This could also be made with younger members of the family too.  A full list of products is below.

I picked these two papers by Vicki Boutin and thought they would do the trick. From her warm wishes collection from last year. You know when you pick paper and get it home and think "why did I buy this!!" well, these two were those for me but to be quite honest in the end they worked out well.


I started by covering one side with the Holly Jolly paper showing the words and to that I added some snowflakes using texture paste and sprinkling on glitter. I inked the edges with Fired Brick. The trunk and the backside of the tree is covered in the vintage pink paper. Then I cut the manufacture strip off and ran it along the bottom edge.
Next I set about fussy cutting most of the baubles from the bauble paper and I placed card under to give dimension when they were added to the tree.

I firstly added the bells (which all tinkle) to the twine and stuck them all down so giving me some idea where to put the baubles. Below you can see the texture paste snowflakes better. You can see I have added some pearls and some Nuvo drops.

I used one of the huge baubles to cut a bow from and placed it on the trunk. I have also used the unused baubles to cut out lots of stars and dotted them about.


Next I took a banner out of 49andmarkets Peace and Joy ephemera pack and placed that at the top. I have so much of this left from last year, you probably do too. There are some new ones in this year's pack that would fit just fine.
To make sure it wouldn't fall in I tucked a couple of small pearls under which you can't see when you look straight at it. I thought if it was to be put away after Christmas for next year that would help it keep its shape.

Thanks for stopping in again today, don't forget these and lots of other lovely supplies can be picked up in person or online at www.themadscrapper.co.uk 

Sue.

Here is the list of supplies from the store:
I used the 12x12 sheet of baubles but it's out of stock now but you can find it in the paper pad below.


Sunday, November 27, 2022

Christmas Cards with Maja Designs

 Hello,

Today I'd like to share with you all some Christmas Cards I have made for The Mad Scrapper Blog using the Christmas Wonderland Ephemera sheet by Maja Designs. You can find a full list at the bottom of the page. Here is a photo showing what I have made using this one sheet with a few images left for another day.


I have used 3 other sheets from the collection to complete the cards along with other snippets from earlier collections because they all work so well together. Here is the photo you will see online.

                              
I started by taking 4 card blanks and choosing the images I needed. I wanted to make one for my friends little granddaughter who must have a Santa on it so I fussy cut out all 4 of them but I used the larger blue backed one.
You can see I have chosen a blue monochrome as well as the Let it Snow paper and the smaller tree image. I stitched around the snow paper with a vintage red and green floss I have distressed both papers and I also added foam behind the snow paper for hight. This card is a 61/2 sq card base.


Here you can see how it looks when complete. I have also used 49andmarkets Holiday Wishes Rub-ons around the card. The Hello Santa, Ho ho ho and several red stars are from them.


This next card is a 5x7 side open and I have used a little brown mat from Bohemian Harmony collection. I added chunky glitter glue for extra snow and Glossy Accents on the lamp.


This one uses the other Santa and again I fussy cut him out and matted him on the same as the first layer to the card. The second layer is also from Bohemian Harmony and I ran that through an embossing folder and passed over a Walnut Stain ink pad to make it pop.  I used a little fern paper through the centre and the sentiment is from last year's Peace and Joy die cut pack. Also, I added red glitter glue to finish off.


This last card is again a 5x7 tent fold and I've added Bohemian Harmony as the first layer. I used the larger tree image and matted it on brown, I tucked a little die cut behind, I thought it helped with the vintage feel. The sentiment is from my all-time favourite Christmas stamp set and I thought it was a perfect fit. The baubles all have glossy accents on them.


I had enough bits on my desk to make a couple of tags using 2 of the smaller images. The other 2 are on the back of the cards. The sentiments are cut from the manufacturer strips (something I never throw out) so everything ties together nicely.


Thank You again for stopping by, I hope I have inspired you to pick up one of these sheets with your next order from The Mad Scrapper   I love these sheets and have been using them for years as I've never been disappointed.

Sue.

Here is the list of products used today:


Wednesday, November 9, 2022

Lovely.

 Hello,

Today I am sharing a layout I have made for the mad scrapper blog using papers and embellishment's available in store by 49andmarket. A full list can be found below.


I started by cutting the Vintage Art paper down to 11.5 and distressed its edges before adding it to a sheet of Boysenberry cardstock. My photo is added to a piece of Curators Botanical solid which I have stitched around. I have used components from Viken Laser Cuts throughout the layout and the purple stitched frame is one and to that I've added a corner of Natural History paper. I also tucked a piece of paper lace under the photos too.

Now I gathered together other elements to use on my project. A very delicate paper ribbon and bow I added to the photo, then all around I added leaves, stamps, butterflies and the title from the laser cut pack. 


To the flowers I have added some pearls from my stash and around the layout you will see black rhinestones.

The little bird was gifted to me and I thought it would look good tucked in there amongst the flowers which are all from 49and market.


I did use some Prima Rub-ons with gold flake in 4 places but unfortunately I have almost covered them up but you just may see a tiny bit popping out from behind the frame. The little yellow butterfly is a rub on too.


Here you can see another little Be Wild rub-on and a laser cut butterfly too.


Here is another look at the layout in full. Thanks for stopping by again today. Check out all the lovely paper collections over at www.themadscrapper.co.uk or if you're lucky enough to live close by pop in.


Have a great day
 Sue.

Here is the list of products used:
From my stash pearls and a bird.


Friday, October 21, 2022

Super Sweet.

 Hello!

Today I'm up on the The Mad Scrapper Blog with this cute layout using papers and stencils from the store. I will as always have a full list below.


I took a sheet of smooth white cardstock and trimmed it down to 10.5inch Square and then using a selection of inks I brushed them through this Tim Holtz stencil towards the centre and around the edges.


Once I'd added the ink I stitched around the edges using 3 different colours mixing them up as I went along. Then I added cardboard to the back and then I attached it to the sheet of pink. As you can see there is a small gap in the stitching because I'm going to add a strip.


Here you can see I have added a 3 layer piece picking up the colours in the hearts.


I knew I was going to use 3 photos but wanted to do something different, so I die cut them into circles and kept that as the theme throughout. I had seen a layout done online and tried to keep to the style I'd seen.


Each photo has a different die used on it and at least one mat to pop it up. I have used ephemera from 49andmarket and stickers from Echo Park.


I have added sequins and Nuvo drops in similar colours to add fun elements.


A closer look at the title and the ephemera used.


Everything works so well together.


Here you can see how I have used the embroidery floss to complement the colours used.


Thanks for stopping in again. I hope this inspires you to cut your photos in to different shapes on your layouts. Don't forget you can get all types of papers and embellishments by shopping instore or online at www.themadscrapper.co.uk

Sue.

Here is the list of supply's used today:

Spectrum Sherbet ephemera pack- out of stock but you may already have them.
Echo Park Girl sticker sheet- out of stock but you may already have them
Sequin mix and Nuvo drops from my stash

Here is the layout I have used as inspiration 


Friday, October 14, 2022

Boho Baby.

 Hello,

Today I'd like to share a layout I have made for The Mad Scrapper Blog it uses a paper collection by Simple Stories called boho baby (a full list below). The photograph is of my cousin's granddaughter Sophia 💖isn't she just gorgeous.


I started by taking 4x6 element sheet and used the B side, to that I added Born to be Wild but not before I cut it down to 11x11 and back stitched with caramel floss and I also used distress ink through my favourite tapestry stencil as well as on the edges too.


The next set of photos show the finished result which I am very pleased with, I do hope you like it too.

Here you can see how I raised the photo on 2 mats with cardboard underneath so I can add things under. I have added vintage lace in a caramel colour, and I have made two flags with a rolled-up edge.


The top edges have a dove tail and a notelet edge both have been inked. You can see I have added stickers and Nuvo drops.


This next photo shows some of the gorgeous flowers available in store which I have mixed together along with acetate leaves.


I made another little flag set and added a cute sticker. Don't you just love that leaf frong quite an impact 


Here's a better look at the main flower cluster along with the chipboard Love I added


I added a small cluster to the bottom right of the photo for balance. I also added peals in different sizes to the layout along with Nuvo drops.


Thanks for stopping by today, I hope I have inspired you to use beautiful flowers even on your baby layouts. Stop by the store if you're in the area if not go to   The Mad Scrapper   and shop from the comfort of your armchair like me.

See you next time
Sue.

Here is the list of items used that are available in store:

Nuvo Drops, lace, pearls, chipboard from stash. The acetate leaves are out of stock, but you may already have them.