Tuesday, January 25, 2022

Happy Gnome Valentines!

 Hello!


Today I'd like to share a  Valentines card I have made using cute papers by Photoplay called Tulla and Norbert's Love Story. I picked these up in the recent store sale at Papermaze.co.uk.


 First I chose my papers, here you can see both sides of them. Then I made my card blank which is 13x6 inches, scoring at 4 and 10. I took a fancy edge die to cut the edges of the card into a swirl finish.

I covered the front with the B side of Cupids-1 and the insides with the A side.


Then I took a piece of teal card cutting to the size of the centre. Looking at the love-notes I chose the Happy Valentines to add to a bit of red card before adding it to the teal. I fussy cut a couple of gnomes out and added them to the panel too.


In this next photo you can see I have added a stack of 3 nesting hearts to the front just hanging over the flap to which I added a large fussy cut gnome on foam pads from the Love-notes sheet and there are 2 on there to choose from.


Here is how it is seen from the inside.


On the front, both sides I have added a few stamped and embossed sentiments along with a few more gnomes and tiny images from the Love-you sheet.


This next photo shows how it stands.


Thanks for stopping by today, I hope you like the inspiration I have shared? Hopefully he'll love it too 🤞🤞
Take care
Sue.


Monday, January 24, 2022

Enjoy Outdoors!

 Hello!

Today I am sharing some cards I have made for The Mad Scrapper Blog and I am using beautiful papers by Maja-design the papers are all 12x12 but I'd like to show that you can cut them down to make beautiful cards for all occasions.

Here is the first card and for this I am using papers from the Enjoy Outdoors collection.


I first chose my papers, all have wonderful b sides too, which as you can see I have in fact chosen to use!   I decided to use the top right image for my card.  The papers are garden-momentscolourful and harvest-time.


I cut a 5x7 white card blank and then cut a slightly smaller size paper and stitched around the edge with the pale green floss. To that I added the stripe but not before adding the yellow floral strip under the right edge. I used the same yellow to mat my image. All edges as always are distressed.


Once I put the card base together I added flowers from 49 and Market in enchanted-petals-twilight using flowers, leaves and seed pods. Also Green Tara cherry-blossoms in ochre and some rose in fuschia and cream


I added vintage artistry rub-ons in butter & lilac a little bit of lace from my stash as well as Nuvo drops in yellow and lilac. The sentiment is from the Identy strip at the bottom of the page.


I also added a little cheesecloth under the main image. You can see here that each layer is raised either by spare card or foam dots.


The yellow I chose to use is because of the yellow flower in the vase. You can see more rub-on's and glue dots below. 


This next card uses the same papers as above with the addition of Miles Apart - Stay Creative.


Again I have taken a white card blank but a 7x7 this time. I have cut the creative paper to size and a stitched white circle to mat the fancy cut circle in the Colourful.  I fancy cut the image and matted that to the b side of Colourful, I will use some coordinating ribbon and I intend to stitch around the edge again.


Here you can see the stitching done and ribbon wrapped, I have put spare card behind to lift it slightly. Then I have added the circles and again they have been lifted but on foam pads.


Here you can see I have added some flowers to the side of the image from 49 and Markets pixie petals range mine are violet along with a couple of roses from my stash and leaves cut from green bazzill-basics 


I also used some Nuvo drops, kaisercraft -rhinestones in dark-purple and a couple of Melange Art Pebbles.


Here you can see a clear pebble along with a gem and another lavender-rose . I also made a tiny bow to add to the top of the ribbon.


This next little note card I have made using all of the above with addition of some bakers twine. This is a small 4x6 card. Just showing you how versatile these papers and images are.


Thanks for stopping by and I hope I have given you some inspiration on how we can use these larger papers for the smaller projects we wish to make.
I hope you can call in at the mad scrapper. if not go online to the store instead.

Till next time, take care.

Sue.


Tuesday, January 11, 2022

Winter Brrr !

Hello and thank you for stopping by today.

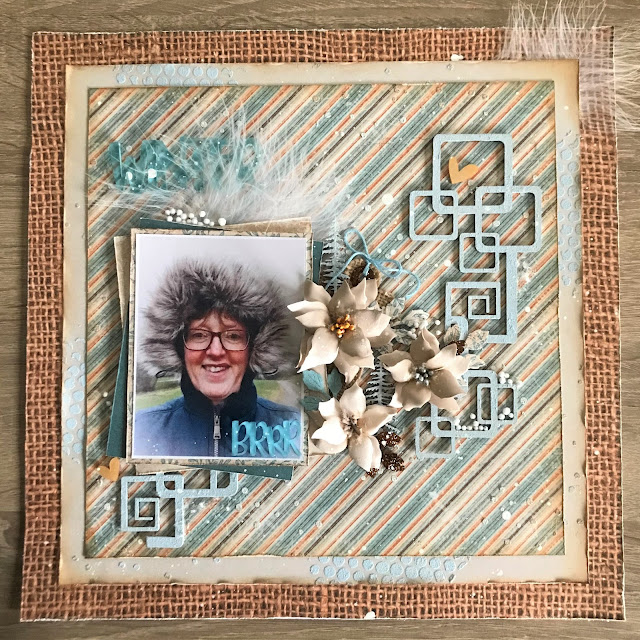
I am sharing over on The Mad Scrapper Blog today this Winter layout. I have used the gorgeous new papers from Maja-design called Bohemian Harmony 


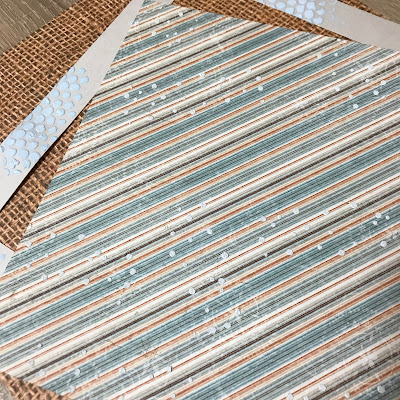
I started by taking a sheet of Kaisercraft Base Coat showing the B side of wicker. Then I took maja-design monochromes-Jasmine and cut to 11x11, lastly I took bohemian-harmony-enjoy-today and trimmed to 9.5x9.5. All edges were inked with vintage-photo-distress ink and then distress. I made up a mixture of white gesso with blue and silver paint added to it as well as snow glitter and passed it through tim-holtz's layering-stencil-bubble and Bramble Fox stencil #24. You can see I gutted the Jasmine paper so not to waste it.


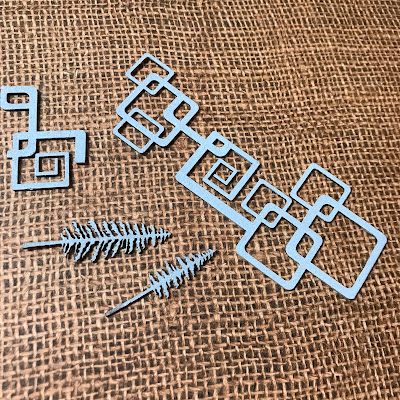
Then I took winters-forest-small and geometric-panel both by Dusty Attic and painted them with the same coloured gesso as the dots above. You can see better the Base Coat paper I used, you may have some in your stash too.


I also got ready to make a few flowers to add to the page out of Foamiran along with a tag cut from burlap which I backed with some Bazzill-basic in sable colour for stability. I also cut out leaves using papers from the Collection Pack which I bought. and some glitter paper.


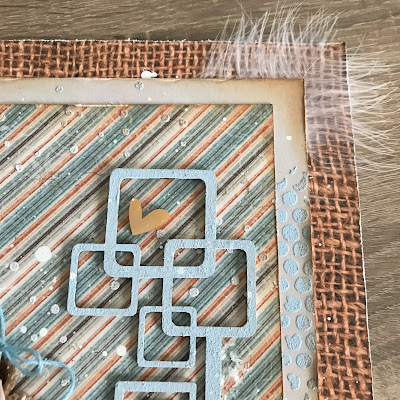
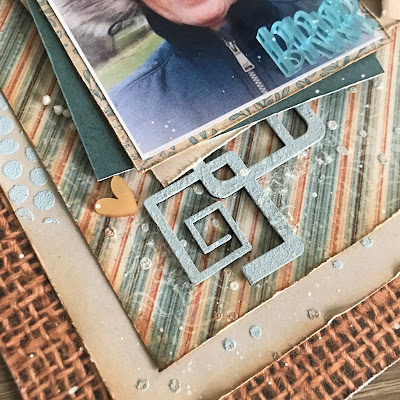
So once all embelishments were made and gathered together it was time to make up the page. First up was to place the geometric panel down on the right side, I also added a feather under the corner. You can see the dots I have added in this photo.


I printed my photo and stacked it on 3 papers from the collection twisting each layer as I went, I put foam under to raise it from the panel. You can see I have added another snippet of the panel to balance. You can also see the Brrr perspextive I have added and a couple of little golden hearts.


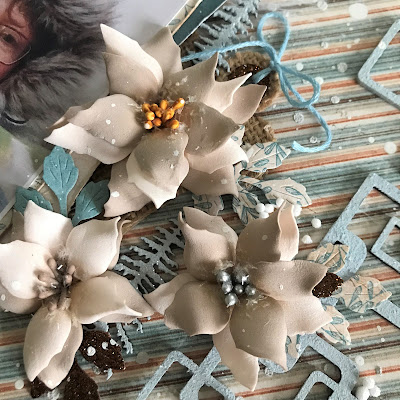
Here is a closer look at the cluster I have placed to the right of my photo. You can just see the tag and tree's along with the flowers and leaves I have made.


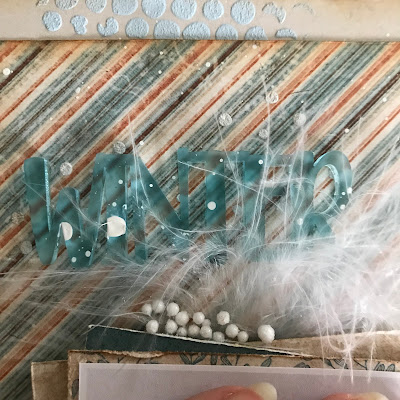
In this next photo you can see the main perspextive title Winter. I tucked another feather under the photo to give a nod to my coat hood.


To finish off the layout I added snowballs, glitter and splatters of white gesso. Again thanks for stopping by today. Stop over if you can soon to themadscrapper.co.uk as there are always new products arriving.

Take Care

Sue.


Wednesday, January 5, 2022

Shades of Boho Birthday Card.

 Hello there!

It's my turn to share a project on themadscrapperblog today and I've chosen to make a birthday card using the wonderful new papers by Maja-design these are called bohemian harmony and you can see the full collection instore.


I purchased the 12x12-collection-pack because I couldn't decide which to have! So for this card I made a 7x7 tent fold card and to it I added the first layer flat, cut slightly smaller of the Dream Big page but first I stitched around the edge with embroidery floss 357, inking the edge with brushed-corduroy and then distressing the edges.


Next I took amazonite and cut a 6x6 piece, after that a slightly smaller piece of slow-down capturing that sentiment in the bottom left of the page, I did just a little stitching in the top right corner before adding ink and distressing the edges and sticking it down to the amazonite paper. To this I added foam to the back before attaching to the base card.


Next I gathered some embellishments I thought I may use. All from 49-and-market plus some blue lace and a ivory daisy from my stash.


Here you can see how I have put the flowers together on the card. Firstly I die cut a doily displaying the opposite side of Dream Big and to the underside I attached the blue lace. Before adding it to the card I put down a couple of leaves from Vintage Artistry In The Leaves - Foliage. I stamped a Happy Birthday on to a scrap of the paper and added it to the doily and then went about adding the flowers I chose from the packs.


I chose one of the large blooms from rustic-bouquet-bluejay but I pulled off the top and added a smaller flower to it, then I added the daisy and the rest of the tiny flowers are from royal-posies-ocean-jade 
and a 1cm-rose-white I have also added more leaves along with some cream pearl stamens. 


Here you can see the sentiment I have chosen to highlight on the card front. This card is for my sister who works tirelessly for her community and has just become a Nana and I'm so hoping she will start to slowdown a little and take time for herself.


To finish the card off I have added kaisercraftself-pearls in denim along with some sequins and a couple of butterflies who come in with the leaves. 
Thanks for stopping by again, I do hope you find time to pop in to themadscrapper either online or the bricks and mortar shop as there are lots of beautiful things to see.

Until next time, take care

Sue.


Tuesday, December 21, 2021

Together Forever

 Hello!

I'm up on  themadscrapper.blog today with this gorgeous layout of my late parents who are now together forever.

Thursday, December 2, 2021

Christmas Cards

 Hello Again!

I'm here on the The Mad Scrapper blog today sharing 2 Christmas cards I have made using papers and embellishments from the Peace and Joy collection by 49-and-market.


I have made these for a brother and sister so I like them to be similar.


I started by cutting out two white 6.5inch circle card blanks and then I took the Wishes paper and cut two slightly smaller circles but using the red side. On to that I passed white Gesso through my Finnabair-Iris stencil, after it was dry I distressed the edges. I added each flat to the card blank.


Then I carefully cut out a smaller circle catching the winter rose and another fancy edge circle from the Holly paper as you can see in the photo below.


I attached chipboard to the wrong side to lift it from the red but not before adding a little Cheesecloth to soften the edges. 
The next 4 photos show the finished cards with the addition of all the lovely embelishments from the Ephemera Kit and flowers from the store as well as my stash.


I used the centre of a doily as the mat for my sentiment, I also added some sweet flower lace with pearls in their centres. The large title banner is from the collection and I made a couple of banner tags from paper cut-offs. The flowers on this card are from royal-posies-tomato along with a pinecone like flower from royal-spray-ocean-jade. I have also added berries and Nuvo drops in red and white.


The next two photos show the other slightly different card. As you can see I have used the second banner from the ephemera kit, there are two others in it but slightly different. I made a tag and added ribbon then tucked it under my cluster of flowers this time from majestic-bouquet in tomatoroyal-posies in tomato and Garden-petals in Parchment I added a couple of crystal berries and a gold one.


Here you can see the sweet little sentiment which I added to a doily I cut out using the last little bit of the red paper. I also added red and white Nuvo drops and to both cards I tucked in leaves and twigs which I die cut from my stash.


I hope you like what I have made for you today and maybe get inspired to use your papers for cardmaking too. Thanks for stopping by today and don't forget to call in at the themadscrapper.co.uk to see all the other beautiful papers in the collection. Till next time, take care.

Sue.